Cryptic Aurelid
Family: Aurelid
Type: Achievement
Zone: Zereth Mortis
Faction: Both
Recommended Level: Level 60
Skill Level: 3/10

Guide
The Cryptic Aurelid mount is obtained by completing the Zereth Mortis meta achievement, From A To Zereth. This achievement is comprised of 7 smaller achievements for doing various things in Zereth Mortis. While not terribly hard, the achievement will take several weeks to complete due to the reputation portion being slow to farm. In this guide, I will go over each achievement one by one below. But first, let’s go over how to unlock Zereth Mortis.
How to unlock Zereth Mortis
To get to Zereth Mortis, you must have completed chapter 2 in the 9.1 (Korthia) campaign. The last quest required is Charge of the Covenants. After it is completed, you should get a popup to start the Zereth Mortis (9.2) campaign. You get a portal to Zereth Mortis on the top floor of Oribos after completing the This Old Waystone quest which is part of the campaign. If you leave Zereth Mortis before completing that quest, you can speak to Tal-Inara in Oribos to return.
I would also highly recommend unlocking flying in this zone by completing the achievement Unlocking The Secrets. It makes getting around the zone much easier. It will also help you to complete the rare and treasure achievements below because several are in high places that can be difficult or even impossible to get to depending on your class and covenant.
To complete Unlocking The Secrets, you will have to: explore the entire Zereth Mortis zone, discover 5 treasures, kill 10 rare mobs, complete all side and campaign quests and collect all 7 pages of “Firim in Exile”.
Secrets of the First Ones
This achievement is very straightforward– it requires you to complete the seven total chapters of the Zereth Mortis campaign. The campaign begins with the quest Call of the Primus which requires you to speak with Tal-Inara in Oribos. There are just over 100 quests in total with this campaign so it’ll take a bit of time!
If you ever get lost on which quest you should be doing next, I would strongly recommend downloading the addon BTWQuests with the Shadowlands module. This addon is very helpful because it shows you the order you need to do quests in as well as providing coordinates. You can also check Wowhead!
Dune Dominance
This achievement requires you to kill all three of the rare elites that spawn in the circular area of the map in the Endless Sands. Their names are High Reaver Damaris, Reanimatrox Marzan and Iska, Outrider of Ruin. Iska is especially sought after due to her mount, Rhuv, dropping Iska’s Mawrat Leash.
/way #1970 63.2 26
This achievement is time-consuming and a bit difficult at the time of writing as these mobs do not have a regular respawn timer. They seem to spawn based on other rares killed in Zereth Mortis but it is currently unknown what exactly triggers it. If you’re on a server with a high population, you may get lucky just camping in the zone. If you’re not, I would recommend killing every rare spawn you see, even if you have already killed it that day. I will provide a list of every single rare in the zone later in this article!
Cyphers of the First Ones
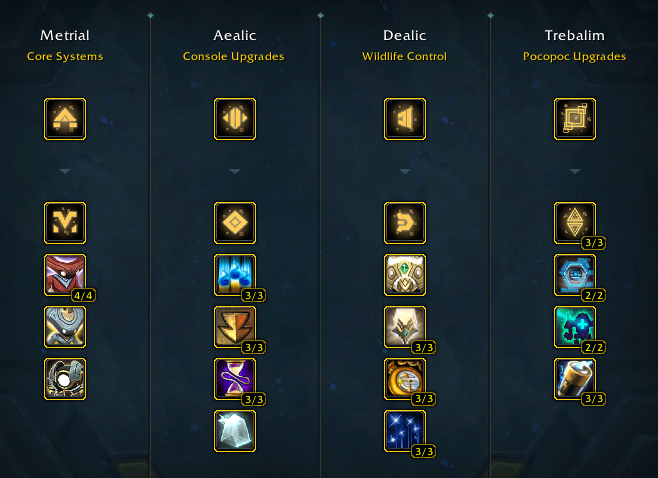
For this achievement, you must fully unlock all trees of the Cypher Console system.
Coords: 33.8 49.5
/way #1970 33.8 49.5
You first encounter the Console on the quest Cyphers of the First Ones which is in chapter 3 of the Zereth Mortis campaign. This Console is a progression system meant to improve player experience while doing content in the zone. It is powered by the Cypher of The First Ones currency and unlocking things is often timegated.
Here are most of the ways to earn this currency:
- 10-15 daily from World Quests in Zereth Mortis
- 62-70 weekly from Tribute of the Enlightened Elders which is the reward from Patterns within Patterns
- 80 weekly from killing the World Boss, Antros
- 2-4 per rare killed or treasure looted
- Several once-per-character treasures give Cyphers
- Caches of Creation Puzzles unlocked with Cachial Understanding. You can instantly open the cache by spending 9 Pocopoc Energy or spend 2 Pocopoc Energy on successfully solving the puzzle. Caches are supposed to despawn when their puzzle is solved. If you aren’t very good at puzzles like me, I would recommend an addon called Zereth Mortis Puzzle Helper. With a little effort, it basically solves the puzzles for you!
- Interacting with Echoed Jiro daily after unlocking the Creatian node
- Completing Altonian Understanding will unlock a questchain with the Jiro starting with Broken Circle. Completing this will make Olea Manu a vendor in Faith’s Repose and it will sell Improvised Cypher Analysis Tool for 150 Cyphers. I would highly recommend this as it will give you 50% more Cyphers and make grinding much faster!
It will require a total of roughly ~4134 Cyphers to fully unlock the console and take about ~12 days combined in wait time.
Synthe-fived!
This achievement requires you to create five mounts or pets with the Protoform Synthesis crafting system. For the purpose of this article, I will be focusing on mounts specifically.
How to unlock Protoform Synthesis
To unlock Protoform Synthesis, you must complete up to the end of Chapter 3 in the 9.2 campaign. You must then unlock the Cypher Console. More information about this console and its’ currency can be found under the Cyphers of the First Ones section of this guide. With the Cypher Console, you will need to unlock the Dealic Understanding tree which takes 3 days and 18 hours to research as well as 200 Cyphers of The First Ones currency. Once that is done, you will then need 220 more Cyphers to unlock Sopranian Understanding which takes 5 days and 18 hours to research.
After your research is complete, you will get a questline starting with Finding Tahli that will eventually unlock the Protoform Repository where you can craft mounts.
Coords: 68.40 30.17
/way #1970 68.40 30.17
The five “easiest” mounts I would personally recommend to craft are Deathrunner, Heartbond Lupine, Adorned Vombata, Serenade and Genesis Crawler. The links lead to detailed guides on this site with information on how to obtain them!
If you’re wondering about my reasoning for each, I picked Deathrunner as it is given essentially for free during the Protoform Synthesis quests. Heartbond Lupine is a unique model with all materials being relatively easy to obtain. Adorned Vombata was chosen due to one crafting material being reputation locked (you will be farming rep anyway for this meta achievement) and the others being easy. Serenade and Genesis Crawler materials are also pretty easy to acquire and have mount models that aren’t already suggested!
The Enlightened
This achievement requires you to get exalted reputation with The Enlightened faction. It will most likely take you the longest to complete because there are limited ways to gain rep and many are timegated.
Here are all the ways to gain reputation with this faction:
• Completing the 7 chapters of 9.2 campaign awards a total of 4050 reputation.
• Completing the side quests A Return to Grace and Technical Difficulties reward 100 reputation each. These quests are both part of short questlines. Other side quests that give rep: WANTED: Custos awards 200 rep, You Supply the Effort awards 75 rep and The Necessity of Equipment awards 50 rep.
• Completing World Quests in Zereth Mortis gives 125 reputation. The best time to do these is when the Sign of the Emissary bonus event is up as it doubles the reputation gained from WQs.
• Killing the rares in Zereth Mortis give between 10-15 reputation each.
• Completing the weekly quest Patterns within Patterns awards 1250 reputation.
• Killing the world boss, Antros, often awards 500 reputation due to their World Quest.
You can also purchase Contract: The Enlightened from the auction house to gain rep with this faction every time you do a World Quest in the Shadowlands.
Treasures of Zereth Mortis
For completion of this achievement, you will need to loot all 27 treasures that are scattered around Zereth Mortis. Below is a map and basic coordinates for each one. I will go over each and every treasure down below as well because most require more than just finding and looting them.
Assuming you haven’t unlocked flying yet, I would strongly suggest joining the Venthyr covenant for this achievement in particular as Door of Shadows is an extremely useful ability to get to treasures you might not otherwise be able to reach. Class abilities such as Infernal Strike, Heroic Leap, Grappling Hook, Soar and Demonic Gateway can also be helpful.
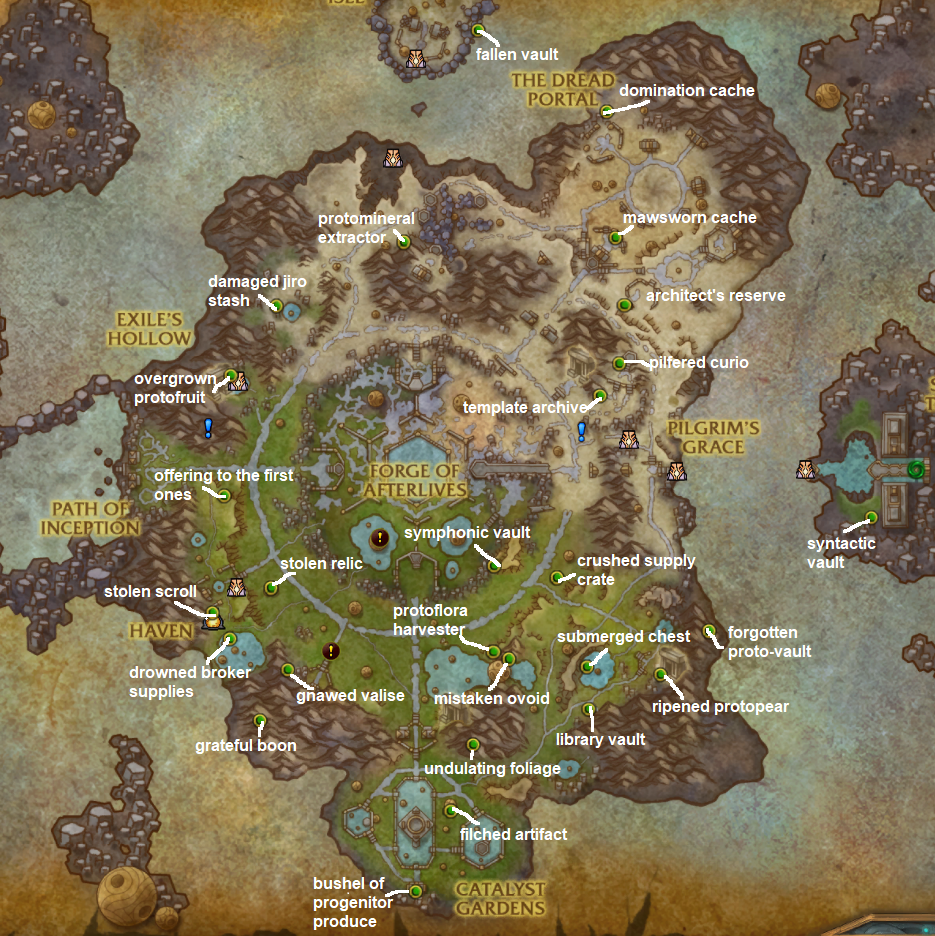
TomTom waypoints for every treasure
/way #1970 58.84 77.15 Library Vault
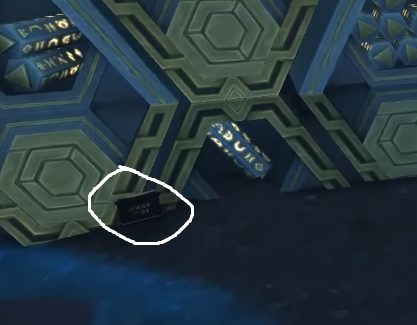
/way #1970 38.27 37.23 Damaged Jiro Stash
/way #1970 66.81 69.44 Forgotten Proto-Vault
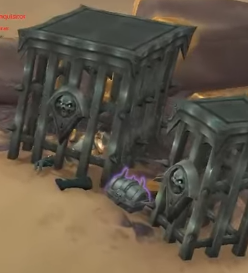
/way #1970 60.61 30.55 Mawsworn Cache
/way #1970 51.55 9.92 Fallen Vault
/way #1970 60.06 18 Domination Cache
/way #1970 61.22 37.21 Architect’s Reserve
/way #1970 35.24 44.11 Overgrown Protofruit
/way #1970 35.17 70.23 Drowned Broker Supplies
/way #1970 46.65 30.93 Protomineral Extractor
/way #1970 34.04 67.65 Stolen Scroll
/way #1970 52.57 71.49 Protoflora Harvester
/way #1970 63.6 73.71 Ripened Protopear
/way #1970 47.44 95.24 Bushel of Progenitor Produce
/way #1970 58.73 73.01 Submerged Chest
/way #1970 59.61 46.19 Template Archive
/way #1970 52.62 63.01 Symphonic Vault
/way #1970 37.9 65.19 Stolen Relic
/way #1970 38.98 73.3 Gnawed Valise
/way #1970 49.75 87.25 Filched Artifact
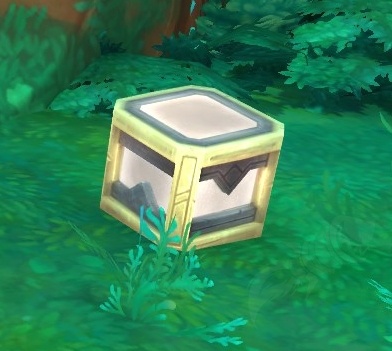
/way #1970 56.78 64.17 Crushed Supply Crate
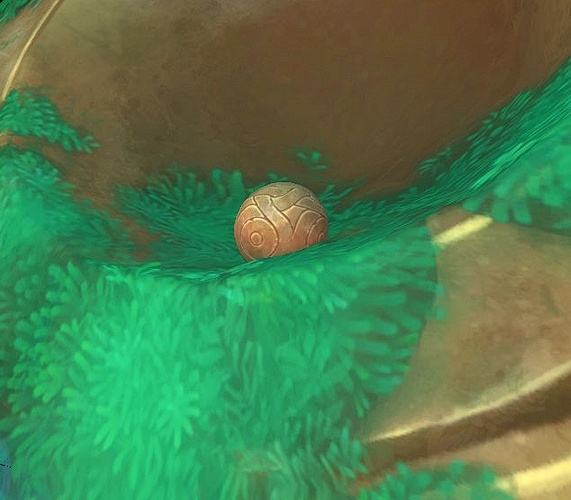
/way #1970 53.57 72.22 Mistaken Ovoid
/way #1970 34.82 56.04 Offering to the First Ones
/way #1970 60.88 42.96 Pilfered Curio
/way #1970 37.15 78.28 Grateful Boon
/way #1970 77.54 58.2 Syntactic Vault
/way #1970 51.23 80.69 Undulating Foliage
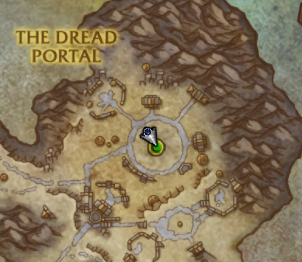
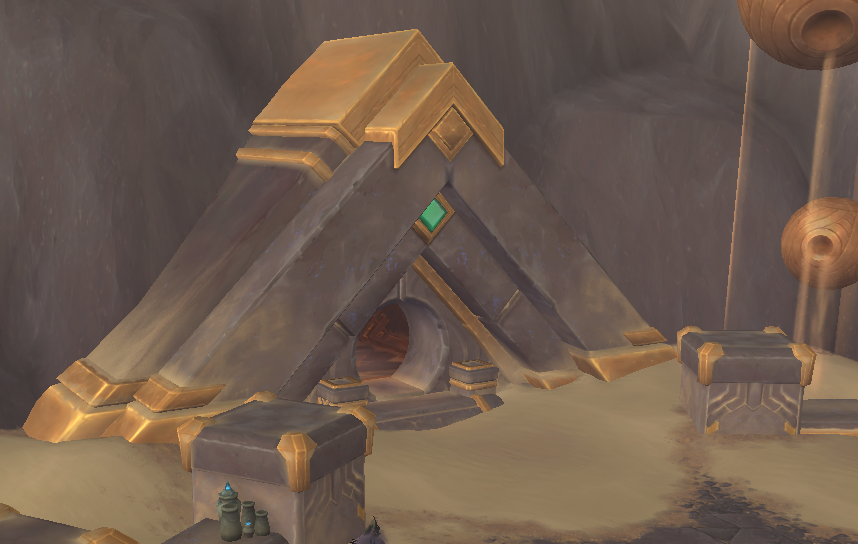
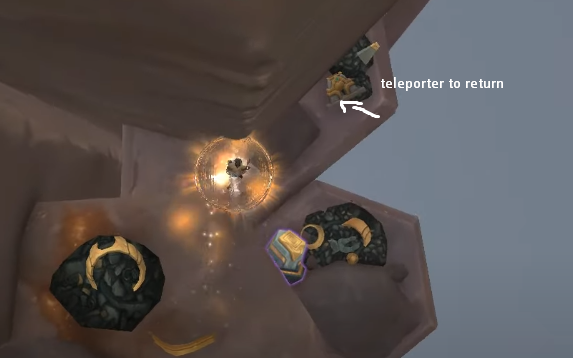
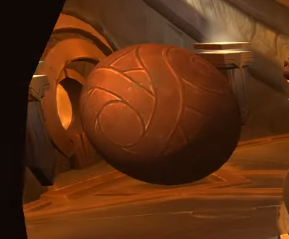
Architect’s Reserve takes multiple steps to unlock. First, you must research Sopranian Understanding. When it is finished, you must pick up the quest Finding Tahli and complete the entire questline, ending with the quest Judgment Call. You will then be able to pick up another quest called The Lost Component in Pilgrim’s Grace. Finish this questline as well. Head to the coordinates listed and they should take you to a triangular building located in the Arrangement Index. Click on the Orb of Transference on the right side of the front of the building. You will be teleported inside and can then loot the Architect’s Reserve. You can leave by using the Orb of Transference inside.
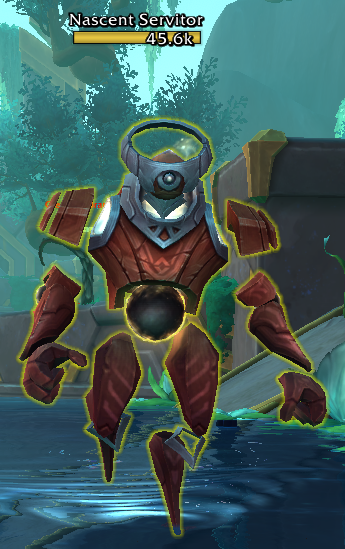
Bushel of Progenitor Produce is in the southernmost part of the map in a vault with a locked door. To open the door, you must get 5 stacks of the Creation Catalyst Overcharge buff. You will need to kill five Nascent Servitor mobs for this. They are generally located in the central water pool section. This buff has a 40 second duration so gather and kill the mobs quickly. Once you have five stacks, you can back to the door. You should be able to simply interact with the door to open it and walk in. There should also be a teleporter in the room to get out again. You can also simply die near the door and resurrect inside if you don’t mind the repair bill.
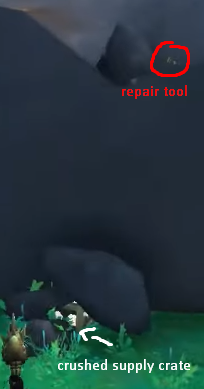
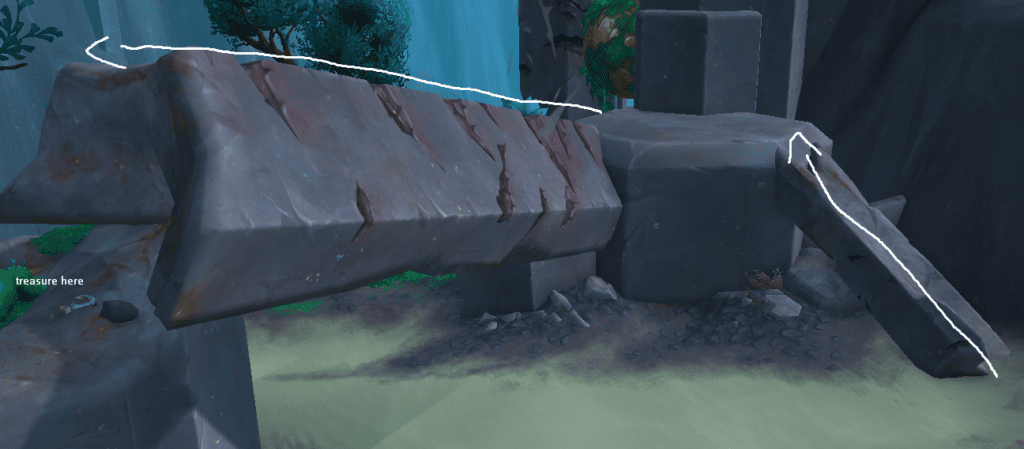
Crushed Supply Crate is normally blocked by rocks. To break the rocks, you will need to pick up the Repair Tool. If you’re standing in front of the Crushed Supply Crate and look directly up, you’ll see it. Walk up the cliffside and you’ll be able to jump onto the pillar. About half way along the pillar is a crevice that contains the Repair Tool. Looting it will give you Roaming Repair Tool. Take this item to Hiu Fi, a small jiro automa nearby, to exchange it for a Jiro Hammer. Type /tar Hiu Fi in your chatbox if you’re having trouble finding this NPC. Once you’ve gotten the Jiro Hammer, you can then break the rocks surrounding the treasure so that you can loot it!
Damaged Jiro Stash is located on a pillar in the Terrace of Formation. You can simply walk up one fallen pillar and then across another to get to it.
Domination Cache requires a Dominance Key to open. These keys have a low chance of dropping from certain dominated automa mobs as well as most elite Mawsworn mobs. I would recommend farming for this in the Endless Sands area of the map. This area has a high density of mobs and most of them can drop the key. Don’t bother with the flying Mawsworn Heralds though as they do not seem to drop it!
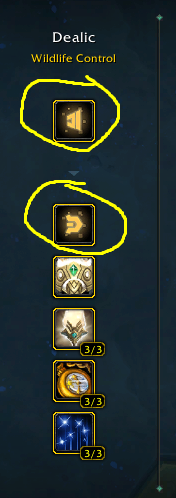
Drowned Broker Supplies is located under the water in the lake to the south of Haven. You will first need to research Dealic Understanding before being able to get this treasure. Once you’ve done this, summon Pocopoc and head to the right side of the lake. There should be a Coreless Aurelid on the edge of the water. Click on it and let Pocopoc take control of the creature. He will swim down and bring the Drowned Broker Supplies to the surface for you!
Fallen Vault is on the very edge of a cliff on the Antecedent Isle. Start at the coords 51.32, 10.19. Jump down once then head to the right side of that platform and jump down again. Treasure should be right there. You can return to the top by clicking on the Forgotten Translactor across from the treasure.
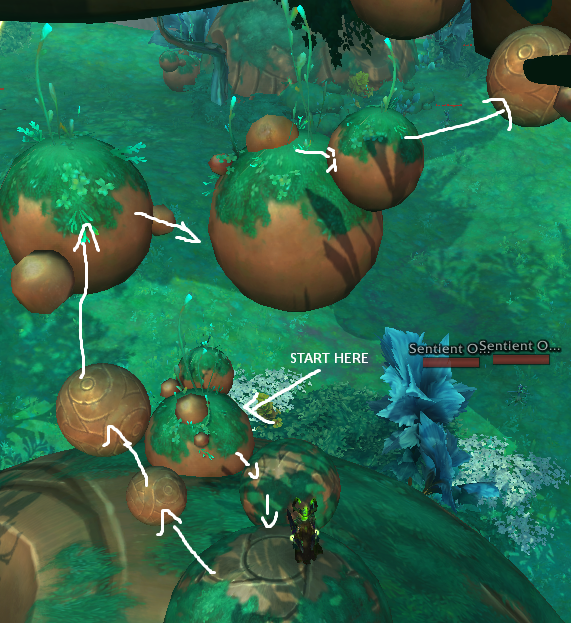
Filched Artifact is located in a nest on a tree branch in the Catalyst Gardens. Flying is most optimal but there is a way to get up that involves a jump puzzle. To start, get on the huge orb platform. There is a medium sized orb connected to it and you can begin by getting on that. Jump from orb to orb upwards in the spiral pattern laid out for you. Once up to the branch, you can jump onto it and walk the rest of the way. As always, Door of Shadows and class movement abilties will be super helpful. If you’re a warlock, you can just put a demonic gate up next to the treasure!
Forgotten Proto-Vault is on top of a mountain. To get to it without flying, you will need to wait for the quest Frog’it to be available and use the Bounding Bufonid vehicle to leap up the mountainside. It was originally only available to loot when the aforementioned world quest was up but this restriction may have been removed.
Gnawed Valise is located on the top of a tall stone pillar in the Cradle of Nascence. You will need a Goblin Glider Kit if you do not have flying/Door of Shadows/class abilities. First, climb to the top of the golden arch and look to the right. Goblin Glide over to the first stone pillar. Afterward, mount up and you should be able to proceed forward jumping from pillar to pillar until you reach the treasure.

Grateful Boon requires you to interact with all agitated animals in the area. There are 5 Agitated Vombata, 4 Agitated Cervid, and 3 Agitated Lupine. After you pet the last one, the NPC Tah Fen will unlock the treasure.
Library Vault requires you to research Dealic Understanding and complete the Protoform Synthesis quest. Once you’ve completed these requirements, you can enter the cave in the Lexical Glade that contains the treasure. Entrance is at the coords 58 81. Around the room, there are several tablets you can click on. You will want to click on the second from the left and it should unlock the treasure. Some people have reported another tablet working so if this one doesn’t, try the other tablets. If none make the treasure lootable, it may be on cooldown.
Mawsworn Cache is simple. It’s between the middle and right cage at the coords provided. It may not always be there but should respawn!
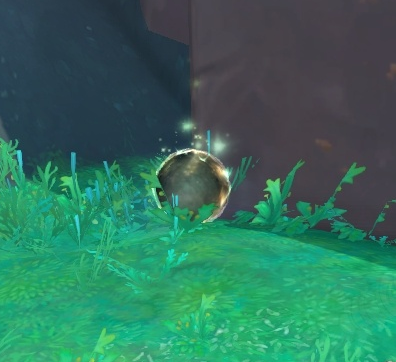
Mistaken Ovoid is located in a cave and requires 5 Lost Ovoids. These are small orbs that can be found all around Zereth Mortis near much larger spheres. I’ve provided a list of known spawn points in the dropdown below. Once you’ve gathered the 5, head back into the cave. Interacting with the Missing Ovoids will cause the Frazzled Poultrid Hen to move and reveal the treasure.
Lost Ovoid possible locations
/way #1970 41.36 69.38
/way #1970 34.54 49.7
/way #1970 35.95 46.03
/way #1970 39.35 50.97
/way #1970 44.6 51.91
/way #1970 34.67 69.25
/way #1970 34.30 66.54
/way #1970 49.22 71.7
/way #1970 50.8 70.86
/way #1970 55.14 76.78
/way #1970 57.19 77.78
/way #1970 60.86 75.9
/way #1970 58.87 65.26
/way #1970 54.21 65.1
/way #1970 60.88 42.98
/way #1970 34.52 49.69
/way #1970 43.22 84.9
Offering to the First Ones doesn’t require anything extra. If you don’t see it up, it should spawn within ~5 minutes.
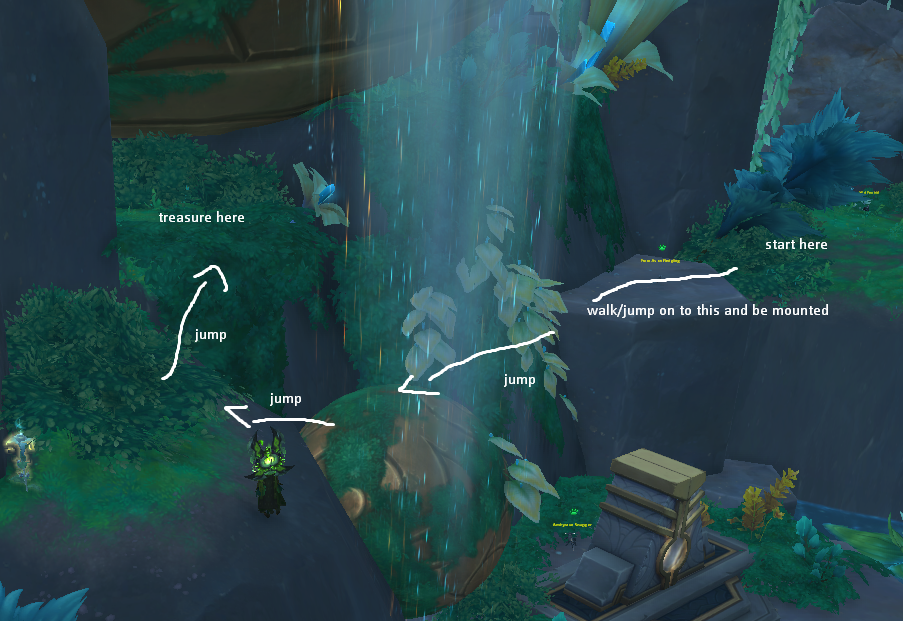
Overgrown Protofruit is on a ledge under a giant sphere in Faith’s Repose. First, turn right when you enter Faith’s Repose and go up the little slope. Mount up and jump to the small pillar and then on to the sphere in front of it. From there, you can jump forward again to a leafy ledge and then, on to the platform with the Protofruit on it.
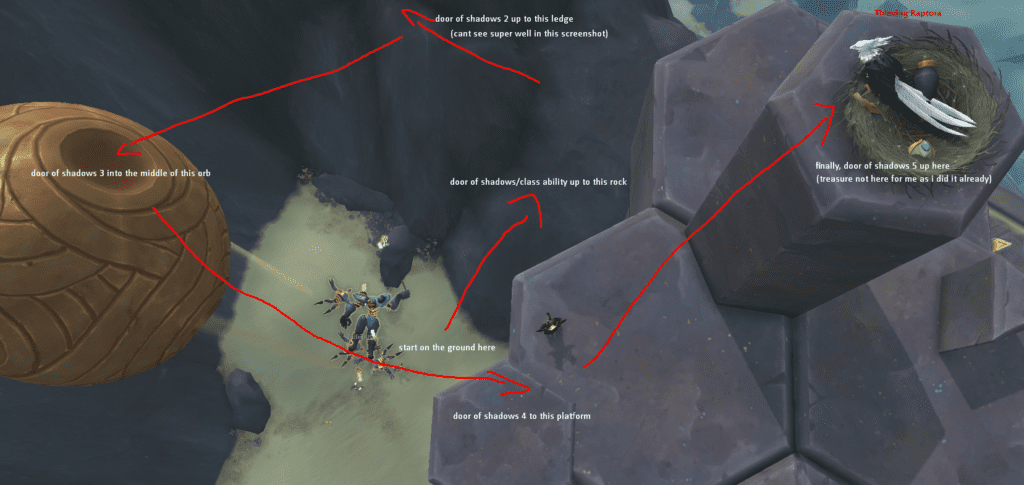
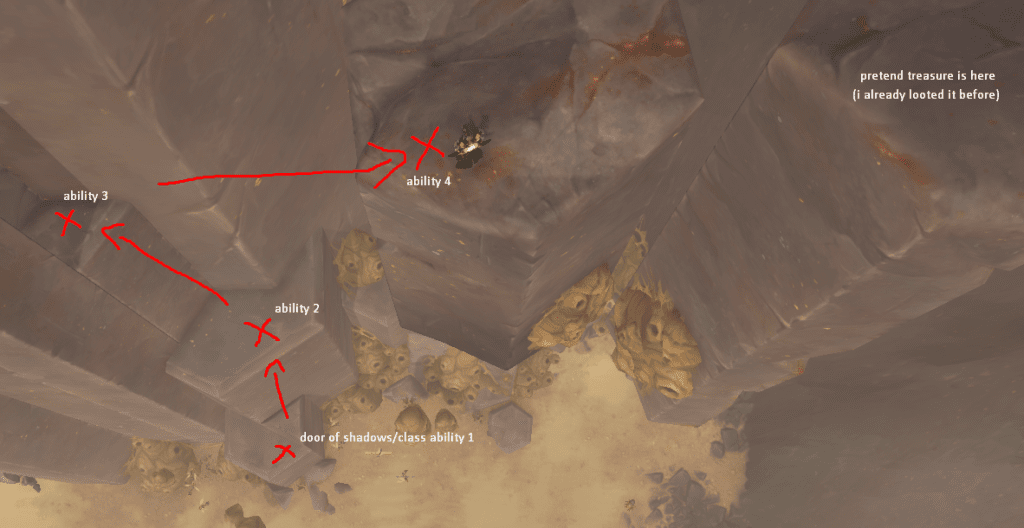
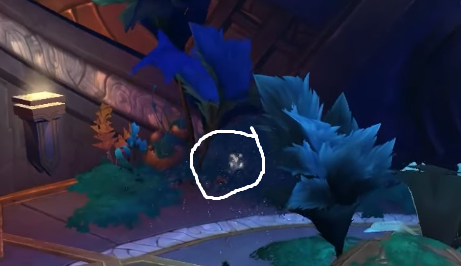
Pilfered Curio is located high up in a nest on a floating pillar platform. You will need to unlock flying for this or use Door of Shadows/class ability as there is no other way to reach it. Check picture below for instructions on how to reach it with five ability uses.
Protoflora Harvester is located on top of a floating orb. If you can’t fly to it, use Door of Shadows or a class ability. Alternatively, you can travel to the cliff above the tree and perform a mounted jump onto the orb. A good spot to do this from is located at the coords 53.26 72.23
Protomineral Extractor is also in a hard-to-reach place if you don’t have flying. I would highly recommend Door of Shadows or other similar class abilities as you can climb up ledge by ledge until you’re at the treasure. If you do not have any of those options available, here is a video guide about using the Locus Shift teleportation system to get to the treasure. You unlock this system in chapter 6 of the Zerith Mortis campaign.
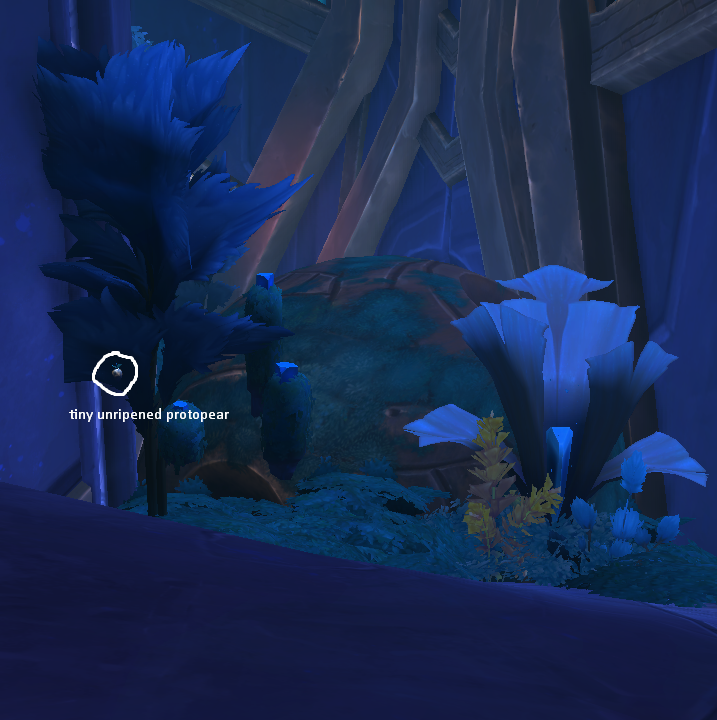
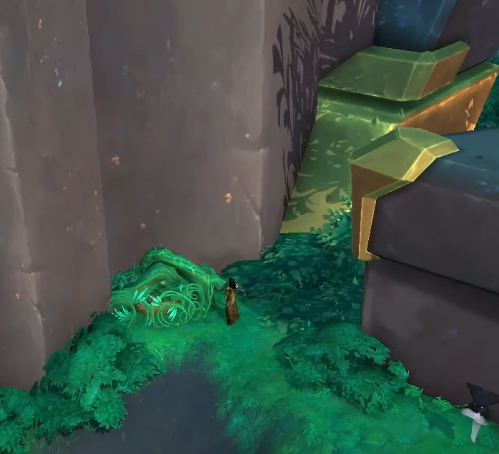
Ripened Protopear requires you to unlock the Cypher Console (chapter 3 of main storyline) and research Sopranian Understanding. After unlocking this, you will need to complete the questline starting with Mysterious Greenery and ending with Moment of Truth. This questchain will unlock the Blooming Foundry vault you will need to access for this treasure. The entrance is located at the coords 63.6 73.71. Inside the Blooming Foundry, you will see green clouds all over the ground. When you pass through a cloud, you will get a Pollen Cloud buff that lasts for 2 minutes. You can only have one stack of this at a time. Once you have this buff, walk back to the Protopear and pollinate it. You must bring five total back to the Unripened Protopear to make it ripe. Once it has transformed to Ripened Protopear, you can loot the treasure!
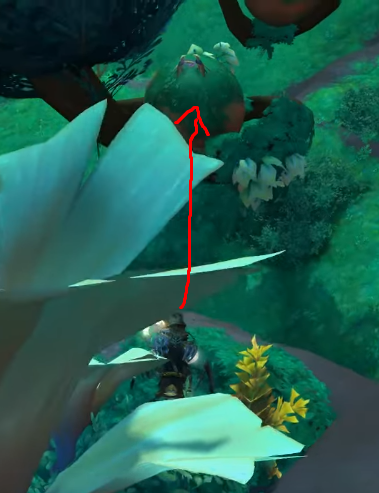
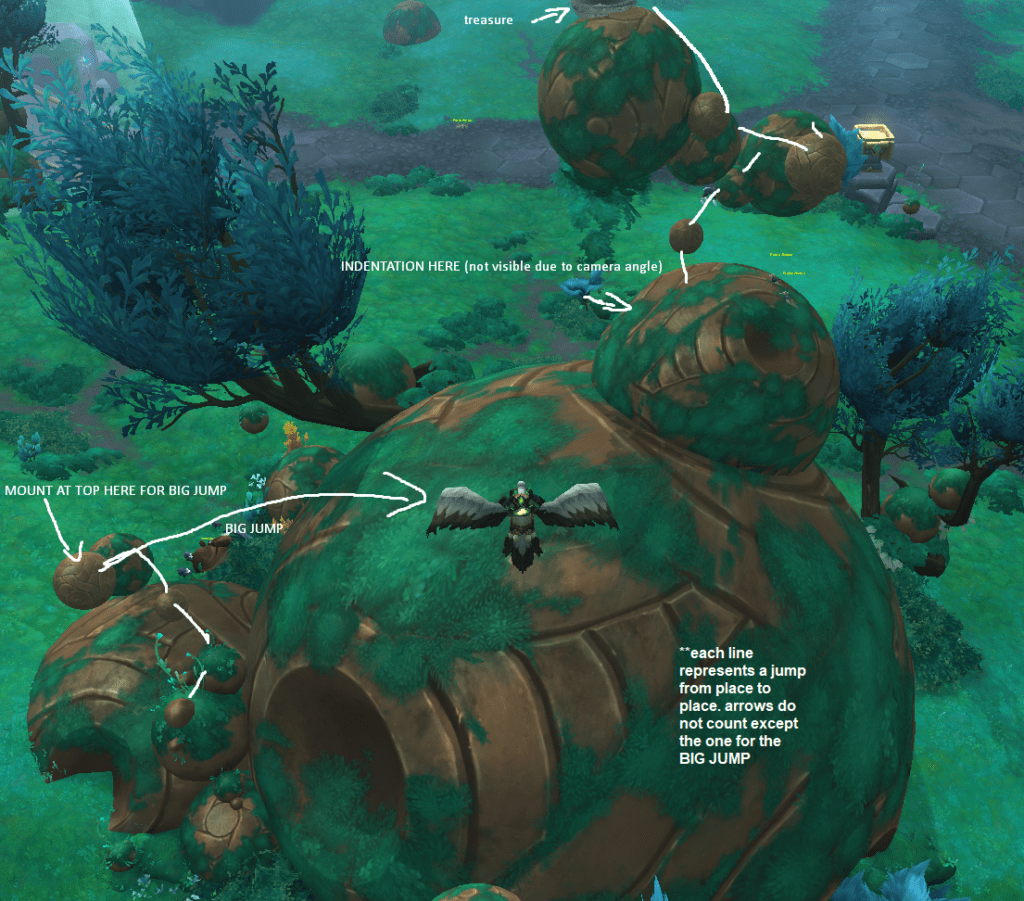
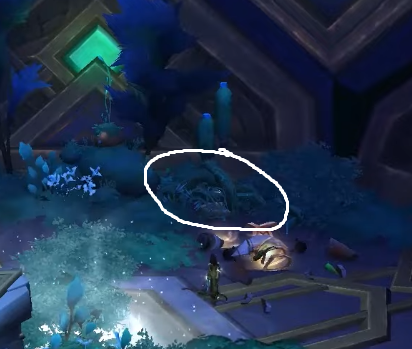
Stolen Relic is another item high up in a nest that requires a jump puzzle to get to. As always, this can easily be done with class abilities and Door of Shadows. To start, you will need to the first jump puzzle on the southwest side where you climb some small spheres. Once you reach the top, get on a mount and jump to the massive centre sphere. Climb into the small indentations of the attached medium sized orb and once again, jump from sphere to sphere until you reach the treasure at the top. If my drawing isn’t too helpful, here is the video I referenced to make it.
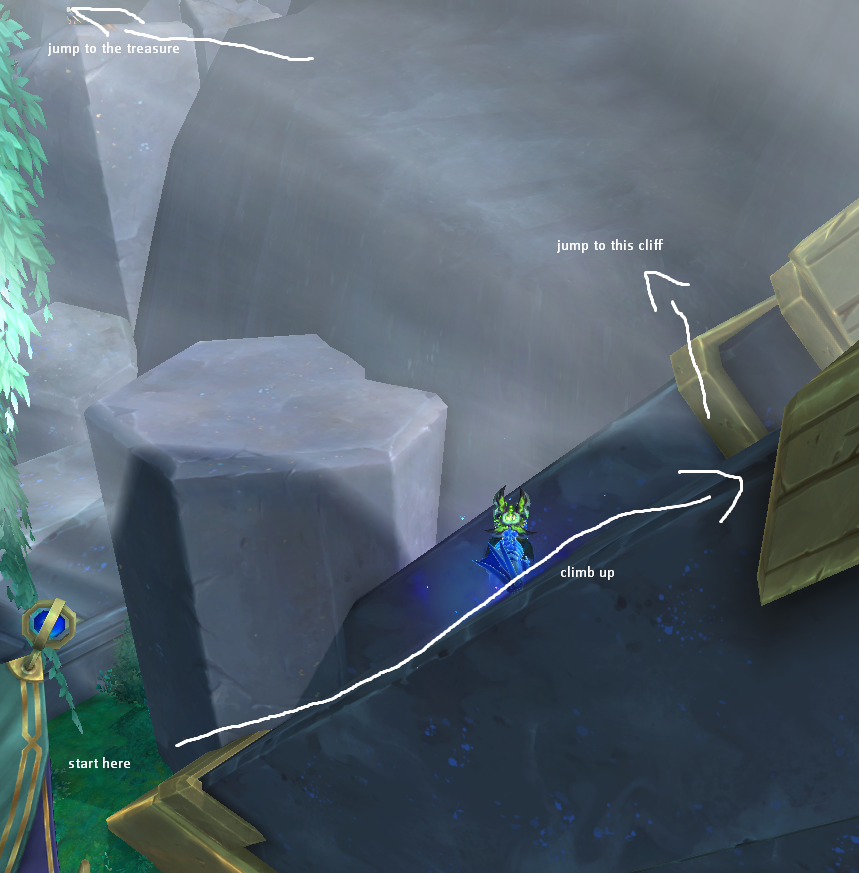
Stolen Scroll is located in a nest on top of a pillar just outside of Haven. You can access it by climbing up the archway in the back of Haven. Get on a mount and start on the gold corner to the left, behind the stablemaster. Climb halfway up until you can jump onto the rocky cliff. From there, you can jump onto the pillar with the treasure on it.
Submerged Chest is under the water in the Untamed Verdure like its name suggests. Southwest of the treasure, there is a Dangerous Orb of Power that you can carry for the Unbearable Power buff. This causes the Forgotten Pump right above the treasure to sparkle and become interactable. Clicking on it will create a swirling pool of water effect, bringing the treasure to the surface so you can loot it. If the pump does not sparkle, it means the treasure has been looted recently and you will have to wait between 5 and 30 minutes for it to be available again.
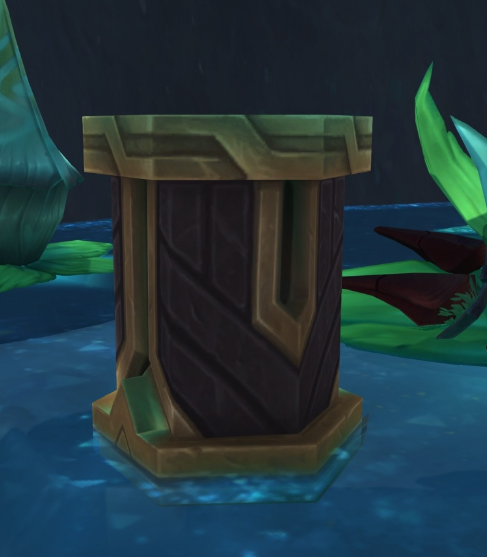
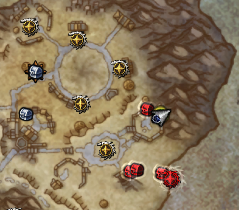
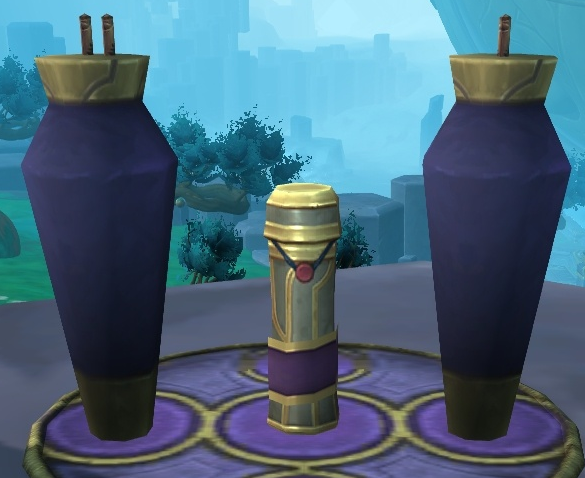
Symphonic Vault is in the Choral Residium cave with the Maw-Frenzied Lupine mob. The way to solve this is by first clicking on the Broken Automa NPC hidden behind the pillar you see when entering the room. Interacting with this NPC will play a series of notes that correspond to the sounds that the four Broken Consoles make. Interacting with the Consoles in order will unlock the treasure. Pressing the wrong Console will knock you down and make you start over again.
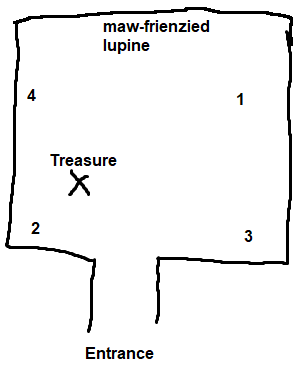
Using the diagram above, the most common reported sequences to solve the puzzle have been 1234 or 12134. If these do not work for you, I would suggest trying different sequences and making note of when you get knocked down. For example: if clicking two knocks you down immediately then you know it’s not the starting Console and so on. Lastly, if you cannot interact with any of the Broken Consoles, the treasure may be on cooldown and you will need to wait for it to respawn.
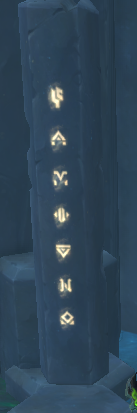
Syntactic Vault is located inside a cave on the Sepulcher of the First ones island. It is locked. To open it, you will need six stacks of the Syllabic Recall buff. You get this buff by pressing on six different Runic Syllables all found on the same island. This buff only lasts for 5 minutes so be quick! Once you have all six stacks, you can head back to the treasure and complete a short channel on the triangle above it to unlock it.
Tomtom waypoints for all 6 Runic Syllables
/way #1970 76.93 60.39 Runic Syllable #1
/way #1970 80.91 56.24 Runic Syllable #2
/way #1970 81.17 50.26 Runic Syllable #3
/way #1970 76.90 46.64 Runic Syllable #4
/way #1970 78.01 53.58 Runic Syllable #5
/way #1970 76.99 58.91 Runic Syllable #6 (in the cave with the treasure chest)
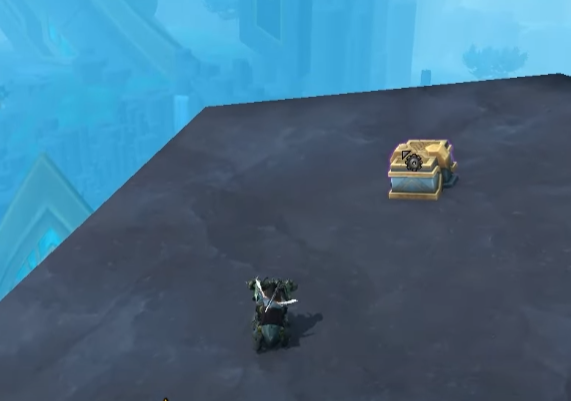
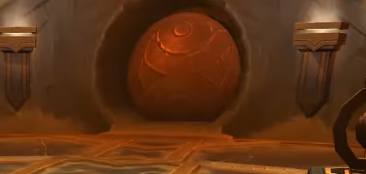
Template Archive is located inside a vault called the Nexus of Actualization. The entrance is at the coords 57.79 44.66. Once you’ve entered the main room, head into the next room on the right. When entering this room, the treasure is on the right side but the path is blocked by an orb stuck in the doorway. To get this orb out of the way, click on the identical orb on the left side of the room. The left orb will roll into the right orb, pushing it down the pathway and leading to the room where the Template Archive treasure is. There is also a teleporter in here so you can quickly leave the area without having to walk all the way back. If you do not see the treasure, it may be on cooldown and you’ll have to wait 5-10 minutes for the respawn.
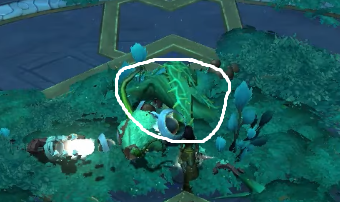
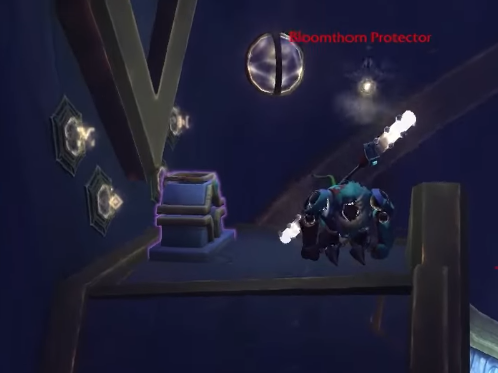
Undulating Foliage is located inside the Catalyst Wards vault. The entrance is located at the coords 49.66 77.85. It is normally blocked by Bloomthorn Barriers which you will have to break. To open this door, interact with the Catalyst Wards Lock to the left of the entrance.
Now, to unlock the Undulating Foliage treasure inside, you must find and click on Four Teleporter Locks. The first one is outside, behind and around the corner from the original Catalyst Wards Lock. The other three are inside the vault. Once you’re in the main room, head to the right. Second lock is in this room to the right of the next door you will go through. Head through the tunnel and you’ve be in a room with The Cultivator mob. The Lock for this room is basically straight ahead, slightly to the right and hidden under vines. Continue to through the door on the left which leads to the final room. The Lock is right in the middle.
/way #1970 50.01 76.71 Teleporter Lock 1
/way #2066 39.58 68.71 Teleporter Lock 2
/way #2066 60.22 87.17 Teleporter Lock 3
/way #2066 69.83 52.50 Teleporter Lock 4
Once you have clicked all four Teleport Locks, you can proceed back to the main room. You do not have to backtrack as the fourth and main (first) chambers are connected. Upon entering, there should be a ramp on the left side. Head up the ramp and there should be an active Teleporter for you to interact with. It will teleport you up to the treasure and you’re done! Also, trying to cheese the treasure using Door of Shadows or something similar will NOT work. You must follow all the steps to gain access.
Adventurer of Zereth Mortis
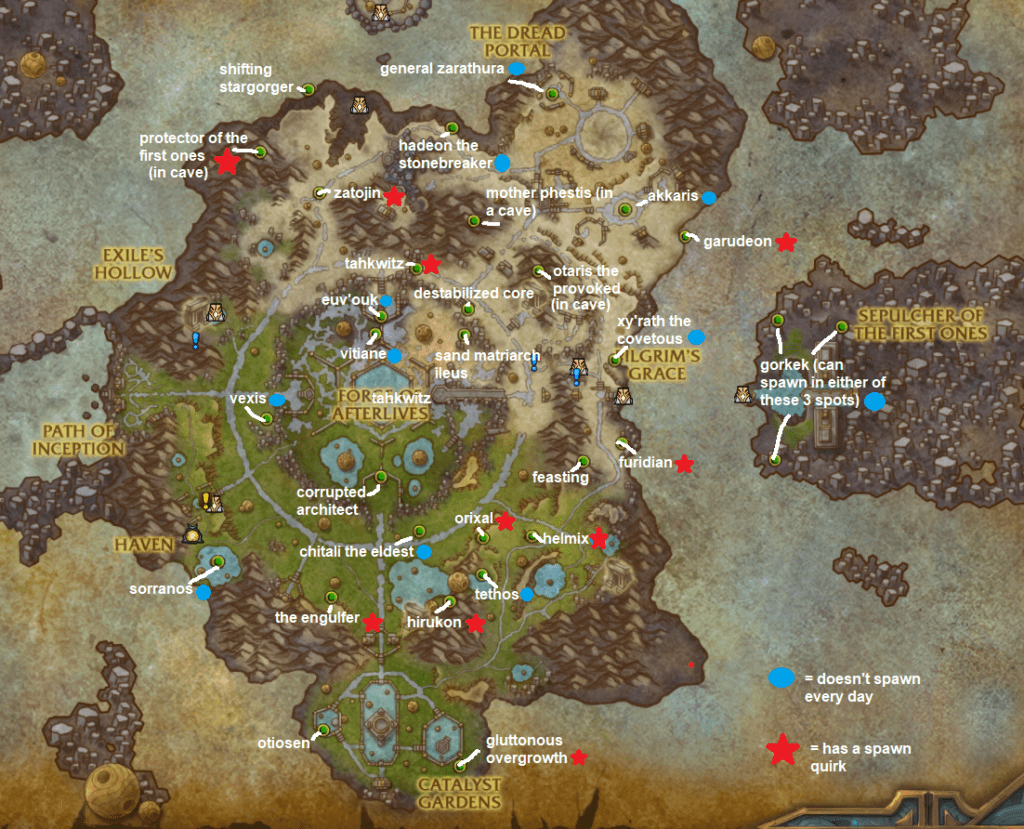
To complete this achievement, you must kill all 29 rare mobs that spawn in Zereth Mortis. This is not counting the 3 rare elites in Endless Sands as they have their own achievement, Dune Dominance, covered above.
Below is a map and coordinates for all rares. If a rare has a red star next to it, it has a spawn quirk. If a rare has a blue circle next to it, this rare has been noted to not spawn every day. Both of these will be expanded on below!
Additionally, it may be worth it to download an addon such as RareScanner or SilverDragon as they will give you a popup and audio notification whenever you’re close to a rare!
TomTom waypoints for every rare
/way #1970 53.08 93.06 Gluttonous Overgrowth
/way #1970 61.82 60.61 Feasting
/way #1970 53.39 47.08 Sand Matriarch Ileus
/way #1970 64.79 33.75 Akkaris
/way #1970 49.99 40.02 Tahkwitz
/way #1970 54.71 68.75 Orixal
/way #1970 47.06 46.97 Vitiane
/way #1970 59.65 21.42 General Zarathura
/way #1970 54.62 72.62 Tethos
/way #1970 38.88 27.63 Protector of the First Ones
/way #1970 69.07 36.64 Garudeon
/way #1970 52.36 75.51 Hirukon
/way #1970 58.65 40.36 13 Otaris the Provoked (Cave entrance at /way 58.74 38.04 13, kill the two mobs)
/way #1970 58.2 68.6 Helmix
/way #1970 43.93 75.07 The Engulfer
/way #1970 43.35 89.20 Otiosen
/way #1970 53.63 44.36 Destabilized Core
/way #1970 64.06 49.76 Xy’rath the Covetous
/way #1970 50.20 67.99 Chitali the Eldest
/way #1970 35.88 71.22 Sorranos
/way #1970 47.48 45.14 Euv’ouk
/way #1970 52.52 25.03 Hadeon the Stonebreaker
/way #1970 75.64 45.53 Gorkek location 1
/way #1970 80.18 46.24 Gorkek location 2
/way #1970 75.43 60.38 Gorkek location 3
/way #1970 42.30 21.00 Shifting Stargorger
/way #1970 54.05 34.96 Mother Phestis (Cave entrance at /way 55.86 32.76 25)
/way #1970 64.58 58.66 Furidian
/way #1970 43.11 31.99 Zatojin
/way #1970 47.46 62.22 Corrupted Architect
/way #1970 39.35 56.08 Vexis
Rares with spawn quirks
Furidian is summoned by interacting with the Suspiciously Angry Vault after clicking on 3 Empowered Keys (floating glowy cube, star and sphere in the area).
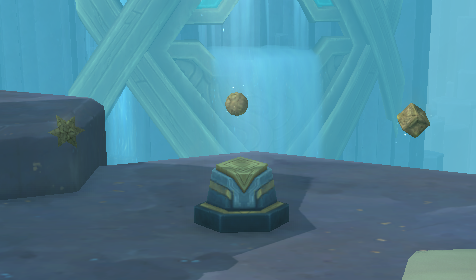
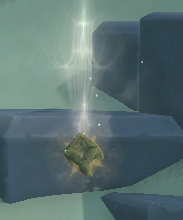
/way #1970 62.59 59.82 Empowered Key 1
/way #1970 64.00 57.30 Empowered Key 2
/way #1970 64.46 60.40 Empowered Key 3
Garudeon is on her nest and is unable to be targeted. You must feed 3 Energizing Leporids found in the area to her nestlings before she will be come down to fight you. Use /tar Energizing Leporid to find one.
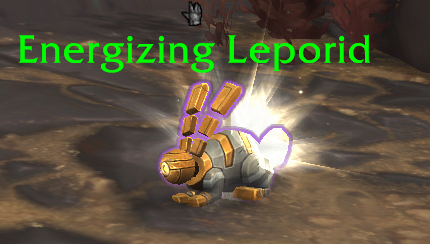
Pick it up and head to the rock platform in front of Garudeon. You should get an extra action button called Throw Leporid. This ability sometimes bugs out so walk around the platform or go get another one until the action button pops up!
Gluttonous Overgrowth is inactive and requires you to pull 5 Bulging Roots in the area in order to spawn.
Bulging Root locations:
/way #1970 53.2 93.2
/way #1970 52.5 92.8
/way #1970 54 91.1
/way #1970 51.9 94
/way #1970 53.4 90.9
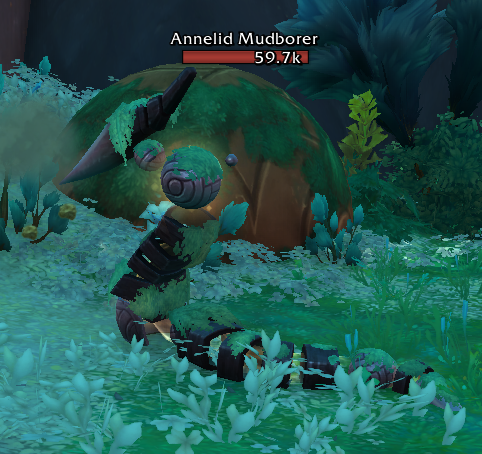
Helmix requires you to kill Annelid Mudborers in the area until it spawns. There is no set amount to make it spawn so it may take 10 or 300.
Hirukon requires a Strange Goop to spawn by yourself. It has a rare chance to drop from fishing in the pond where Hirukon is swimming or you can buy it on the auction house. Someone else can spawn in this mob for you if you do not wish to go through the process yourself. More information can be found on the Deepstar Aurelid guide, which is a mount that drops from this rare.
Orixal shares a spawn with Overgrown Helicid and you must kill that mob repeatedly until it spawns. It should not take as long as Helmix does though!

Protector of the First Ones is in a cave blocked off by a barrier. it usually requires two people to deactivate. Check which sigils are glowing on both sides next to the entrance. Both people will need to find the corresponding Mysterious Sigils in the area near the rare and then bring them back to deactivate the barrier.
Locations of all four possible Mysterious Sigils:
/way #1970 42.49 26.78 Mysterious Sigil 1
/way #1970 43.02 25.19 Mysterious Sigil 2
/way #1970 41.37 24.31 Mysterious Sigil 3
/way #1970 40.54 23.94 Mysterious Sigil 4
People have found alternative ways around this. The first is by camping in the room until the Protector spawns as the barrier will be down. The second is by dying near the barrier, walking through it as a ghost and resurrecting on the other side. It is also possible to open the gate solo if both barriers have the same sigil and you can quickly move from one console to the other.
Tahkwitz is on this list because it spawns very high up and can be a challenge to get to without flying unlocked. I would strongly recommend choosing the Venthyr covenant to use the Door of Shadows ability to climb up the rocks. Here is a useful YouTube video that shows the path to take. Class abilities like Heroic Leap and Infernal Strike may also work. Lastly, you can use the Gravid Repose teleportation system learned in Chapter 6 of the campaign. You will need 30 cosmic energy and then you can teleport up to the Ultimus Locus Arrangement. From here, you should be able to use a Goblin Glider or Evoker/Demon Hunter Glide ability to get to this location!
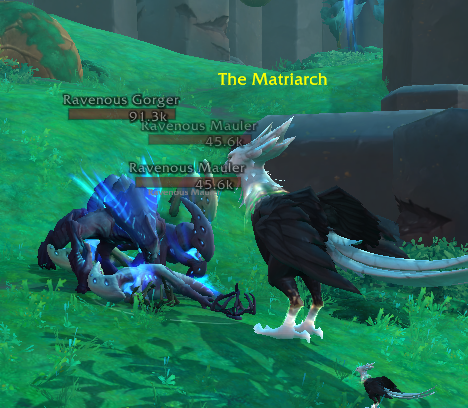
The Engulfer is triggered by helping The Matriarch. You must kill multiple waves of mobs and protect her from dying. After you’ve killed enough, the Engulfer will spawn. This mob has been known to bug out occasionally.
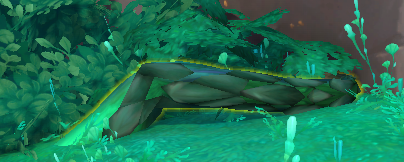
Zatojin is flying high up and is untargetable. To get it to come down, you must pull the small wasps in the area called Menacing Vespoid Workers. Do not kill them though as you need to reach 20 stacks of the Paralytic Sting debuff for Zatojin to be targetable!
Due to the level difference in Dragonflight, you will now start to dodge the attacks so it will be difficult to reach 20 stacks. People have found a way around this by getting Pocopoc to take aggro in his Aggressive Coroutine combat form which requires research in Trebalim Understanding. In addition, they used a toy called Fruit Basket to pull the mobs for Pocopoc without taking aggro. Pocopoc may need healing to stay alive so use your class heals or his Supportive Coroutine combat ability!
Rares that don’t spawn every day
The following list of rares may not spawn every day. They can be up several days in a row but it is not guaranteed.
Akkaris
Chitali the Eldest
Euv’ouk
General Zarathura
Gorkek
Hadeon the Stonebreaker
Sorranos
Tethos
Vexis
Vitiane
Xy’rath the Covetous
For these rares specifically, I would recommend checking the Wowhead front page under the Shadowlands section as they keep track of which are up that day.