Shellack
Family: Snail
Type: Achievement / Dungeon
Zone: Dragonflight Dungeons
Faction: Both
Recommended Level: Level 70
Skill Level: 5/10

Guide
The Shellack mount is awarded upon completion of the meta achievement, Glory of the Dragonflight Hero. It has 25 total sub-achievements you must earn by competing various tasks in the main 8 Dragonflight dungeons: Al’gethar Academy, Brackenhide Hollow, Halls of Infusion, Neltharus, Ruby Life Pools, The Azure Vault, The Nokhud Offensive and Uldaman: Legacy of Tyr. The megadungeon, Dawn of the Infinite, does not have any achievements related to this meta. Additionally, you must do the achievements on Mythic dungeon difficulty.
Most, if not all, of the achievements were soloable for a skilled player with good gear in Dragonflight season 3. As of Dragonflight season 4, the dungeon system was reworked so I am unsure if this is still the case. For this reason, I would suggest completing the achievements with a friend, if not a whole party. If you’re a solo player, you can find other players who want to group up for the achievements in discords such as Achievements as well as WoW Secret Finding & Collections.
Another thing I would suggest is the addon Instance Achievement Tracker as it helps a lot with tracking what you need to get done for each achievement. It also has an option to post instructions for an achievement in the chatbox which can be helpful if your group isn’t communicating in a voice call.
Now, let’s get into it! Dungeons will be listed in alphabetical order with all achievements related to the dungeon grouped together in boss order e.g. Al’gethar Academy and all of its achievements listed first, then Azure Vault, and so on.
Al’gethar Academy
For this set of achievements, you’ll need to head to the Al’gethar Academy dungeon located in northern Thaldraszus on the Dragon Isles continent. To get there, you can take the portal to Valdrakken in the portal room of your main city of Orgrimmar or Stormwind. Then, fly northeast until you reach the dungeon

See Me After Class
This achievement is for the first boss of the dungeon, Vexamus. It is pretty simple and can be soloed. During the fight, the boss will use the Arcane Orbs ability that spawns five pink orbs that slowly start moving toward the boss. Usually, you’d want to stand in front of the orbs to prevent them from hitting Vexamus and giving it energy. However, for this achievement, you simply need to make sure players do not touch any of the orbs. Besides that, you can just kill the boss.

If a player gets hit by an orb, everyone will need to leave the dungeon and reset it so you can try again. The party leader can do so by right clicking their portrait and selecting “Reset All Instances” under Instance Options.

Duck, Duck, Spruce
The next achievement concerns the second boss, Overgrown Ancient. To the right of the exit (heading towards the pitch), there is a little pool where Well-Fed Ducks spawn.


Every person in the group must click on a duck to place it on their head. You will get the debuff Well-Fed Duckling that makes your movement speed 65% slower. After everyone has the duck debuff, simply kill the boss!
Squad Goals
The last achievement for the Al’gethar dungeon is for the third boss, Crawth. Crawth spawns on the Talon Toss arena, which is a dragon sport involving throwing balls through hoops. During the fight, Play Ball! will become active when the boss reaches 75% and 45% health. Glowing balls will spawn around the arena. You will need to throw them into the goals on the left and right sides via the Throw Ball extra action button you’ll get from standing inside the circle on the ground.

Get 2/3 goals on each side during the first Play Ball! phase.

Now, for the achievement, a ball will need to pass through the left and right goals at nearly the same time. For whatever reason, the Air (direction) ball is slightly slower and will need to be thrown about a second before the Fire ball. I recommended doing a countdown so both players know exactly when to throw the ball. If you can’t do an ingame pull timer during combat and you’re not in a voice call, you can use the macro below. It will countdown from 3 to 0. Air would throw their ball at 1 and Fire would throw their ball at 0.
/run for i=1,4 do C_Timer.After(i, function() SendChatMessage(4-i, "PARTY") end) endIf the achievement fails, you will need to reset the boss and try again. You can tell if it failed by tracking the achievement on your sidebar. If the achievement stays red, it didn’t work. If the achievement turns white, you can kill the boss!
This achievement is technically soloable but you have to be very fast. A Wowhead commenter managed to do so on vengeance demon hunter by using Infernal Strike and spamming the extra action button. Another soloed on mage by dropping Alter Time on one circle (throwing location), using double Shimmer to the other goal and then pressing Alter Time to get back to the first.
Azure Vault
For this set of achievements, you’ll need to head to the Azure Vault dungeon located in southern Azure Span on the Dragon Isles continent. To get there, head to either the Orgrimmar or Stormwind portal room and go through the Valdrakken portal. Then, fly southwest until you reach the dungeon.

You Must Be Made of Hide
This achievement is relevant throughout the whole dungeon, so it is listed first. To get this achievement, you must not step on any polymorph traps or trigger any Shrieks from whelps. The polymorph traps look like blue runed circles on the ground that can be found in several places in the dungeon. As the name suggests, stepping in one will polymorph you.

The Shrieking Whelps are found in the first portion of the dungeon. They are baby blue dragons with a circle around them. Stepping in their circle will cause them to shriek, which will cause more adds to come to their defense as well as fail this achievement.

This is a personal achievement so if one member of the group steps in a polymorph trap, it won’t affect anyone else’s ability to get the achievement. As long as you haven’t stepped in a trap or stood in the whelp’s circle, you will be awarded this achievement upon killing the last boss.
Icy What You Did There
The second achievement is on the third boss, Telash Greywing. Once you arrive on his platform, you will see a floating blue crystal to his right. You can’t click or target it at first.

The boss has an ability called Icy Devastator. It will target one person at random, usually a DPS. It looks like a large blue line being channeled onto your character.

For this achievement, the person that is targeted by Icy Devastator must stand on top of the blue crystal. The crystal needs to be hit with 12 stacks of this ability. Icy Devastator is channeled for 4 seconds each time so you can get a maximum of 4 stacks per cast. Every 4 stacks, the crystal will transform from Slightly Icy Crystal to Somewhat Icy Crystal to Moderately Icy Crystal. At 12 stacks, it will become a Very Icy Crystal. The Very Ice Crystal will have icy particle effects coming off of it, as well as the name change. You can kill the boss once the crystal become Very Icy.
The Cracked Crystal
This achievement is for the last boss, Umbrelskul. Upon making it the boss’s room, you should see three purple geodes around the edge of the room.

The boss has an ability called Dragon Strike. It will always target the tank.

Have the tank stand behind the geodes so the Dragon Strike ability will hit them. Doing so will cause 3 Geode Chunks to spawn. Kill the Chunks and repeat the process two more times. Make sure someone in your group tags the Chunks that spawn every time. If the boss kills the Chunks, and nobody in your group tagged, it will not count for the achievement. Once you’ve broken all 3 geodes and killed all 9 Geode Chunks that spawn, you can kill the boss!
Brackenhide Hollow
To complete this set of achievements, you’ll need to enter the Brackenhide Hollow dungeon located in the southwestern corner of the Azure Span on the Dragon Isles. Start in Valdrakken and fly southwest until you reach the entrance!

Growlbossify
This achievement is for the first boss of the dungeon, Hackclaw’s War-Band. When you walk into the boss arena, you should see a caged gnoll in the back of the room.


You should also see a weapon rack on the left and right sides of the room.


The point of the achievement is to free Chief Softpaw (the gnoll in the cage) and give her the shield and spear. When you release her from the cage, Softpaw will run around in fear and can even run out of the arena, causing you to not be able to give her the items. I would suggest sending two high mobility classes to pick up the weapons while a third player unlocks the cage so they can give the items to Softpaw as fast as possible. Additionally, the boss’s abilities will hit Softpaw, and can even kill her, so make sure to keep her out of harm’s way. Once she has h
All Bark, All Bite
This achievement is for the boss Treemouth. It requires each player in the group to be eaten by Treemouth at least once. Treemouth uses its ability Grasping Vines to pull people in and if you’re in that circle, it will Consume you.

I would not recommend DPSing the boss at all until the achievement is completed. If Treemouth takes enough damage while Consuming that the absorb breaks, the people will get spit out and the full cast will not have gone off. Being Consumed does generally hurt a lot so use any defensives you have! You will know if someone has been eaten properly if they have the Partially Digested debuff.
There are some reported issues with getting this achievement. If it’s not working for your group, you may need to relog or possibly get Consumed multiple times. Personally, my group did 4 people in the first Consume and then 1 in the second and the achievement worked perfectly for us!
So You Can Kill This in a Way That Matters
This achievement concerns the last boss, Decatriarch Wratheye. You will notice you can go up to slope to get to the top behind her. This is where the Altar of Decay for crafting is located after the boss is dead. Before the boss dies, it is covered in a green fog that will silence you as well as doing damage. There are three mushrooms located on the edge slightly outside of the green fog that your group must get. Their locations are shown below with raid markers.

You will not be able to interact with the mushrooms until after the boss is pulled.

Get everyone into position and then pull the boss. Have each player pick up their mushroom and then use their extra action button to plant them in the boss arena. The tank will then have to destroy each one with the boss’s ability Decaystrike. You will know a mushroom has been destroyed successfully if you can no longer see it and you have a 20 second undispellable debuff called Fungal Matter that does damage over time. This debuff stacks so I would not recommend destroying them all at once. After all 3 mushrooms have been planted and destroyed, the boss can die!
Halls of Infusion
This batch of achievements is for the Halls of Infusion dungeon located in central Thaldraszus. It is a short flight east of Valdrakken. Additionally, the dungeon entrance is found near the bottom level of the central circular pillar structure of Tyrhold.

Toxicity Strike Team
This achievement is actually not boss focused! After killing the first boss, head down the hallway shown in the screenshot below.

You will come across a room with a large pool of water that has a rotating titan device in it on the left side. Send one player to jump down in the water and swim to the most eastern part of the chamber. My arrow is at the correct location in the screenshot above. You are looking for a tiny button that says Purge Intakes when you mouseover it.

When you press the button, a large blue swog will spawn on the walkway you came from. Have someone pull her right away so she doesn’t jump up onto the pipe near the ceiling. Now, kill the Toxic Swogmother to complete this achievement!

Hungry Hungry Hornswog
This achievement is for the second boss of the instance, Gulping Goliath. The point of the achievement is to have the boss eat 10 Curious Swoglets while Hangry.
When the boss casts Overpowering Croak, it will summon Curious Swoglets. You will want to stand near each other when this happens so the swoglets are grouped close together. Now, you’ll have to CC the swoglets until you’re ready to use them. Do this by using long-lasting AOE CC abilities such as Mass Entanglement, Landslide, Mass Polymorph, Sigil of Misery, etc. Now, when the boss uses its first Gulp ability, do not let it eat anything. If this is successful, the boss will turn red and get the Hangry debuff.

Now, you’ll want to wait for another Overpowering Croak to spawn more little swoglets. After that, drag the boss over to them before its Toxic Effluvia ability. It will use Gulp soon after to eat the swoglets.

It does not have to eat ten in a single Gulp. After eating, the boss will no longer be Hangry (red) so if it did not eat enough, you’ll have to wait until you can get it Hangry again. After the boss has eaten ten swoglets while glowing red, you can kill it!
Go With The Flow
This achievement is Primal Tsunami, the last boss of the dungeon. When the boss reaches 50% health, it will go into intermission and use its Cast Away ability. This ability sends you to one of the three corridors. Instead of walking back right away, turn around and go to the end of the corridor to kill the Flow Control Unit. After all three are dead, the boss can be killed!

Note that it does not have to be intermission to kill the Flow Control Units, it merely just gets you there quicker. As long as you have someone to tank the boss, you can walk back to kill the Units at any time.
Neltharus
For the following set of achievements, you’ll need to head to the Neltharus dungeon located in the Obsidian Citadel area of western Waking Shores. Be careful flying through the first lava section as there are djaradin ballistae that will knock you off your mount if you reach 10 stacks. You can reach Neltharus by flying northwest from Valdrakken.

Knowledge is Preserved
This achievement is for the boss Chargath, Bane of Scales. When you walk into the boss arena, you’ll notice it is like a library with many books around the room.

The point of this achievement is to complete the encounter with less than 15 books being burned. The easiest way to complete this is by baiting his abilities like Magma Wave and Dragon Strike to the stairs where there are no books. Be careful not to let him get Fiery Focus off or he will burn up all the books very quickly. You interrupt Fiery Focus by walking the boss through the chain attached to you from Grounding Spear to “trip” him with it. Three players must do this but try not to break them all at once as it tends to hurt a lot!
If you’re planning to do this achievement solo or duo, I would suggest tanking him by the door specifically as you won’t need as much space.
Ready for Raiding VIII
Forgemaster Gorek is the boss this achievement is about. You have to avoid being hit by any boss abilities to complete it. It is a personal achievement meaning that if one player fails, the rest of the group can still get the achievement.
The abilities you have to dodge are Forgestorm (random orange swirlies that generally spawn under your feet), Forgefire (pool left over after the final Slam of Heated Swings), Blazing Eruptions (lots of orange swirlies spawn in four directions around the targeted players after Blazing Aegis), the final Slam of Heated Swings (leaps to target and slams down hammer in big orange circle) and another player’s Blazing Aegis (red circle around target player, he throws a shield at targeted players hitting anyone within 3 yards).

Kill the boss as fast as possible, don’t stand too close to others and dodge anything you see on the floor!
Liquid Hot Magma
This achievement is for the boss, Magmatusk. Upon entering the boss’ room, you will see a table on the right side. On the table is a Draconic Tincture.

Pick up the Tincture and use the extra action button to throw it onto the boss before you pull it. Anyone can throw the Tincture, your group just needs to make sure the boss has five stacks of the Magma Tentacle buff. You can check by clicking on the boss. The buff changes some of Magmatusk’s abilities such as making the duration of Magma Eruption longer, increasing Lava Spray damage, and increasing the number of Lava Waves spawned by Blazing Charge. All you have to do now is kill the boss.

Nokhud Offensive
To complete this set of achievements, you’ll need to go to the Nokhud Offensive dungeon located in central Ohn’ahran Plains. Start in Valdrakken and fly southwest until you reach the dungeon.

*IMPORTANT*: The achievement for the last boss, Balakar Khan, requires a class that can heal.
What Are The Chances?
This achievement has to do with the boss, Raging Tempest. The first three bosses in this dungeon can be killed in any order so you could do this one first if you’d like to get it out of the way.
The easiest way to complete this is with five players. The point of this achievement is to have a player get struck by 5 Lightning Strikes at once. I would recommend the tank for this job as the ability really hurts. Lightning Strike is a boss ability and it looks like a large blue circle around your player. The tank should stand in the middle under the boss, while the other 4 people fan out around them but still overlap their circles so they hit the tank. Try not to hit anyone else with your circle and use a defensive!

You will know that you have done this successfully if a Storm Elemental spawns. Kill the add and then you can kill the boss.
You can technically do this achievement with less than five players but it’s a bit more complicated. I did it with 3 people and it worked as follows: tank, healer and my main character all zoned in and went to the boss. Healer and I logged off our mains and into two alt characters. Healer alt and my alt entered the dungeon and stacked together under the boss with the tank. Tank pulled the boss. Healer and I did ALT + F4 (press these two keys on your keyboard at the same time) on our alts.
It is VERY IMPORTANT to do ALT + F4 as it will keep the characters in the game because it functions similar to a disconnect. We then quickly reopened WoW and logged into our mains. We stacked our mains on top of our disconnected alts so our Lightning Strike circles all overlapped. It killed everyone but the tank. However, the tank finished off the add + boss and we all got the achievement!
This can even be done by one person but they’d have to be super fast and the last character would need to pull the boss before any of the disconnected alts disappeared from the world.
Weapons of the Maruukai
This achievement usually requires three people but can be done via the ALT + F4 method mentioned above. It is centered around the bosses Teera and Maruuk. There are three weapons players must pick up– Spear of Tolui, War Axe of Berke, and Bow of Sartaq. They are found in caves near the boss arena.


A player can only hold one weapon at a time and they must be picked up before the boss is pulled. Once you pick up a weapon, you will get a 5 minute debuff. The War Axe has a debuff that slows your movement speed by 30%, the Bow reduces your incoming healing effects by 20%, and the Spear increases your damage taken by 20%. Kill the boss within the 5 minutes and you’ll get the achievement!
Note that if any player dies, the weapon will be dropped and must be picked up again.
Nokhud Deed Goes Unnoticed
This is the achievement for the final boss, Balakar Khan. It requires a class that can heal. Get Balakar down to 60% health, which will cause him to enter intermission. Then, kill the Nokhud Stormcasters. Now, your healer has the heal Ohn’ahra, the giant bird behind the boss, up to full health. I would recommend tracking this achievement to make sure it turns white before killing the boss!

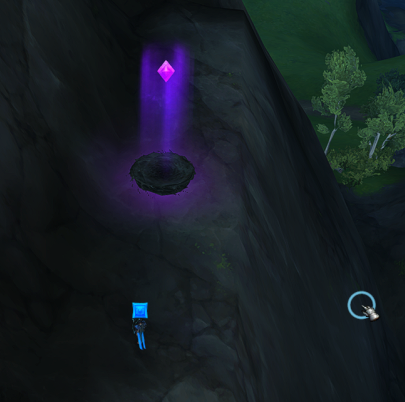
Ohuna Incubation
This achievement can be done without killing any bosses. You have to find 8 ohuna eggs that are scattered throughout the dungeon. There are generally in high places such as on mountains.
First, you’ll need to find Ohuna Keeper Taruk. He is located in southeastern Maruukai.


You will be returning here after every egg to deposit it into the basket beside Taruk. You can only pick up one egg at a time and you have 3 minutes to bring them back to the basket. The eggs are found at the following locations. There are 10 shown but you only need to bring back 8!
Also, the eggs look like nests on the ground that you can pick up. There are no actual visible eggs.

Below are visual reference images for the locations of all of the eggs for your convenience. You can pick which eight look easiest to you!
Egg 1

Egg 2
Egg 3

Egg 4

Egg 5

Egg 6

Egg 7

Egg 8

Egg 9

Egg 10

Once you’ve returned eight of the eggs to the basket, you should get the achievement!
Ruby Life Pools
For this set of achievements, head to the Ruby Life Pools dungeon located in southern Waking Shores. To get there, fly northwest from the city of Valdrakken.

Are You My Broodmother?
This achievement spans the entire dungeon so it’s listed first. To start, have your tank pick up the Nascent Ruby Egg in the first room near the dungeon entrance. It is behind a pillar and hidden amongst foliage so it can be hard to spot. I would strongly recommend having a class that can heal as you’ll have to make sure the egg doesn’t die later in the dungeon via healing it.


*IMPORTANT*: If the person carrying the egg DIES or MOUNTS UP, they will drop the egg. The group has five seconds to pick up the egg back before it will disappear. If it disappears, you will need to reset the dungeon.
Also, it is important to note that the egg sometimes glitches and doesn’t show on the carrier’s back. You can check if it’s still there by looking at the person’s buffs. If they have the buff, then they’re still carrying the egg no matter if it’s showing or not! You can also use this buff to check the status of the egg and make sure it has changed properly when following the steps below.
On the first boss, the egg carrier needs to soak the boss’s ability Hailbombs. It looks like a white swirly on the floor.

If they’ve done so correctly, the egg will become Chilled Ruby Egg and have a grayish fog around it. You can then kill the first boss, though she does have another achievement needed called Dragon Kill Points mentioned below.
On the second boss, the egg carrier needs to soak the massive red swirly caused by the ability Ritual of Blazebinding. This tends to hurt a lot which is why I suggested the tank carry the egg. If the egg has become Seared Ruby Egg and now has a red fog, you can kill the boss. The second boss has another achievement called Does Steam Do Fire Damage? which you may want to complete first before killing.
On the third boss, you will want the egg carrier to get hit by Kyrakka’s Roaring Firebreath ability. If it’s been hit correctly, it will become Tempered Ruby Egg and drop to the floor.

As shown in the image above, the egg will have a healthbar when it’s on the ground. You will need someone to heal the egg to make sure it doesn’t die. You can then finish off the final boss to get the achievement. After the achievement is complete, the egg will hatch and a baby red proto-dragon will temporarily follow the person who carried the egg.
Dragon Kill Points
This achievement is for the first boss, Melidrussa Chillworn. You need to spawn in and defeat 40 Infused Whelps before killing her. There are four sets of dragon eggs around the room. You spawn in whelps by standing on top of the eggs to break them. Track this achievement on your sidebar and it will turn white when you have killed the correct amount of whelps. You can then defeat the boss!

Does Steam Do Fire Damage?
This achievement is for the second boss, Kokia Blazehoof. As you’re running around the room clearing trash before the boss, you should see four pools of eggs.

You will want to drag the boss to each of the pools. The boss has an ability called Molten Boulder. It spawns a large boulder that targets a random player and rolls toward them. You want the boulder to roll through each pool. The boulder often hits the corner of the pool and doesn’t roll all the way if you stand in front of it so I would recommend having everyone stand either inside or behind the pool. Additionally, make sure to kill the adds the boss spawns. If you have multiple out, they really start to hurt!
You will know if the boulder has hit properly if the pool has a steam effect above it afterwards. If not, you’ll need to try again.


After all four pools are steaming, you are free to kill the boss!
Uldaman: Legacy of Tyr
This dungeon is located near the original Uldaman dungeon in Badlands on the Eastern Kingdom continent. To spare you the long journey, there is actually a portal to the Badlands from Valdrakken. It is located in the Obsidian Enclave section of the city in Sorotis’ study.

/way #2112 26 40.9


It’s a Trogg Eat Trogg World
This achievement is for the second boss, Bromach. It is pretty simple. During the fight, Bromach will use his Call of the Deep ability to summon more troggs to join him in battle. You’ll need to kill Bromach while 10 or more of these Stonevault Troggs are alive. You should have enough after about 4-5 uses of the ability.
You can then kill the boss. That being said, be careful not to AOE too much while killing the boss or you may lose too many troggs to complete the achievement. Also, make sure to kill the Quaking Totem when it spawns as it does a lot of group wide damage.
No, You’re Stunning!
This achievement has to do with the boss, Sentinel Talondras and can be a bit tricky. So, the boss will spawn golden orbs with her Resonating Orb ability.

If you’re in a group of 5, she spawns three at a time so you’ll have to wait for at least three casts. Also, make sure she is not in Titanic Empowerment as it causes her to be immune to CC for 40 seconds.
Next, the tank will want to drag her through two of the orbs which will remove her Inexorable buff that prevents her from being stunned. Have all of your players stand by their own orbs. Now, you’ll want the tank to drag her through the third orb which will stun her. Immediately after, have all party members stand in their own separate orbs as well so they get stunned. You have about six seconds for everyone and the boss stunned so you may want to do a countdown to make sure everyone is ready. If it is timed correctly, you’ll get the achievement! If not, you’ll have to repeat the process but you can keep trying until you get it right. Once you’ve gotten the achievement, finish the boss off.
Additionally, despite the achievement’s wording, it does not require a full group.
Like Sands Through the Hourglass
This achievement is for the very last boss, Chrono-Lord Deios. It is pretty easy! During the fight, he will use an ability called Eternity Orb. These look like yellow orbs that come down from the sky with a beige swirly under them.

You are going to want to stand in 20 of these swirlies to catch the Eternity Orbs before they hit the ground. Once your group has caught 20, you can kill the boss!